Soggy waders are a fisherman's worst nightmare, leading to discomfort, potential health issues, and the dreaded lingering smell of mildew. Traditional drying methods, from hanging them upside down to using bulky, expensive dryers, often prove slow and inefficient. The result? Waders taking hours, sometimes days, to dry, leaving you sidelined from your favorite pastime. Imagine instead, a quick and affordable solution that gets your waders back in action faster than ever before.
This article presents a comprehensive guide to building your own DIY wader dryer, a cost-effective and surprisingly efficient method that drastically reduces drying time. We’ll walk you through a simple, step-by-step process, using readily available materials to construct a dryer that rivals commercial models in performance. Let's dive into the detailed instructions and build your own wader-drying solution today!
Preparation and Safety Guidelines
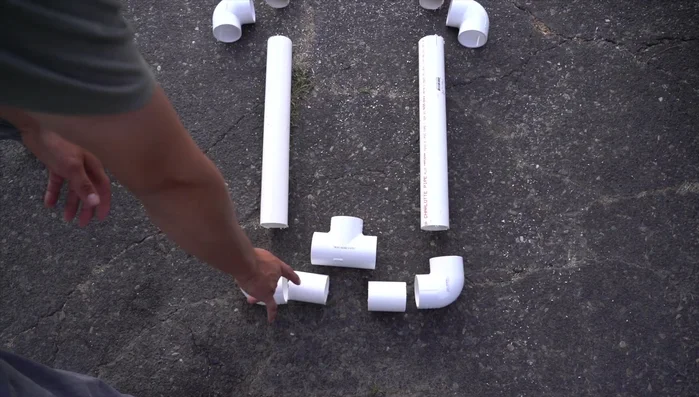
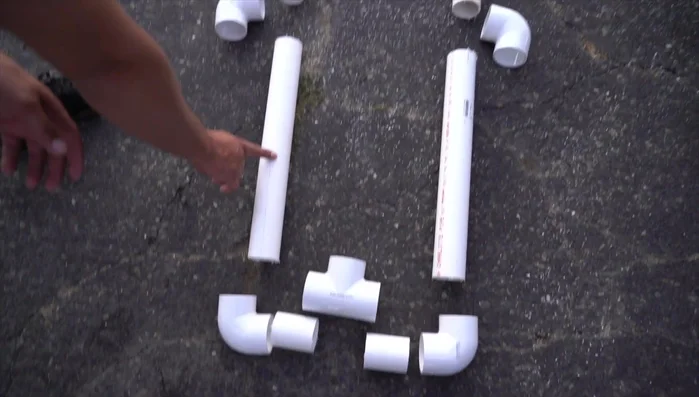
- 2-inch PVC pipe
- PVC fittings (elbows, 45-degree couplings, Ts)
- PVC cement
- Never use a dryer designed for clothes to dry waders. High heat can damage the wader material and create a fire hazard.
- Always ensure your waders are completely free of any flammable materials (like gasoline or solvents) before attempting to dry them.
- Proper ventilation is crucial. Drying waders indoors should only be done in a well-ventilated area to prevent the buildup of moisture and potential mold.
Step-by-Step Instructions
Prepare Materials
- three 3-inch pieces, two 18-inch pieces (base), two 2-foot pieces, one 9-inch piece (center support), two 3-foot pieces (top).

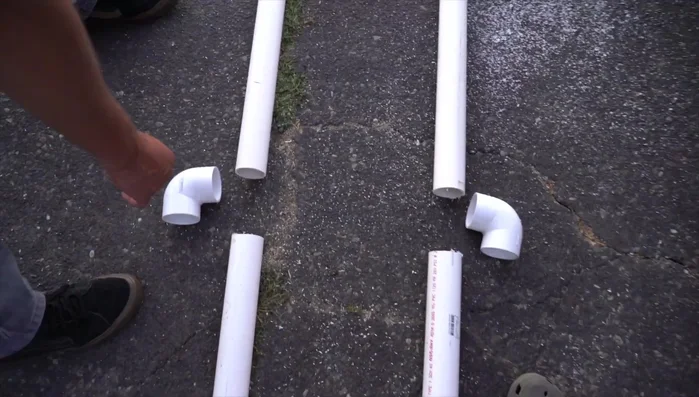
Prepare Materials Build the Base
- Assemble the base using the two 18-inch pipes and two Ts.
- Attach the two 2-foot pieces to the base Ts.
- Connect the 9-inch center support piece between the two Ts.
Build the Base Construct the Top Section
- Attach the two 3-foot pieces to the tops of the 2-foot pieces using the 45-degree couplings.
Construct the Top Section Dry the Waders
- Place the waders over the dryer, with the boots resting on the 45-degree couplings.
Dry the Waders


Read more: Ultimate Neoprene Wader Repair: A Step-by-Step Guide
Tips
- Use a hairdryer to blow warm air into the waders. The 2-inch PVC pipe fits perfectly with a standard hairdryer.
- The 12-inch spread between the 45-degree couplings allows for proper boot placement and stability.
- Use the cool setting on the hairdryer to prevent overheating the waders.
- Drying time depends on the hairdryer setting (10-30 minutes).
- Adding a center support piece significantly improves the dryer’s stability.