Net making, an ancient craft, demands precision and skill, particularly when security is paramount. From fishing nets that must withstand the relentless pull of the ocean to safety nets ensuring crucial protection, the strength and reliability of the knots are paramount. A single weak point can have devastating consequences, highlighting the critical importance of mastering secure knotting techniques. The success of any net relies heavily on the consistent application of these techniques, affecting not only its durability but also its efficiency.
This article delves into the world of secure knotting, providing a comprehensive guide to the most reliable methods for creating robust and long-lasting nets. We'll explore various knot types, detailing their strengths and weaknesses, and ultimately guiding you through the step-by-step process of creating a truly secure net. Prepare to elevate your net-making skills to a new level of mastery.
Safety Guidelines
- Always use sharp, high-quality netting needles to prevent injury and ensure clean, secure knots. Dull needles increase the risk of slippage and hand injury.
- Practice knotting techniques on scrap material before working with your final net to avoid mistakes and wasted materials. Perfecting your knots will create a stronger, more durable net.
- Regularly inspect your finished net for loose knots or damaged areas. Early detection and repair prevent larger issues and potential safety hazards, particularly if used for fishing or trapping.
Methods: The Secure Sheet Bend Knot for Net Making
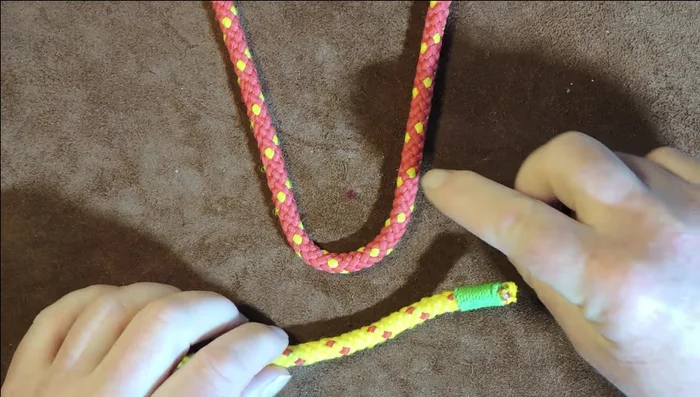
Tools Needed
- Netting needle
- Cordage
Step-by-Step Instructions
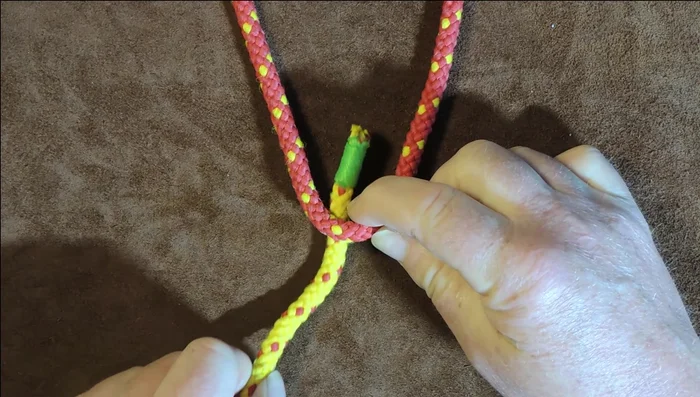
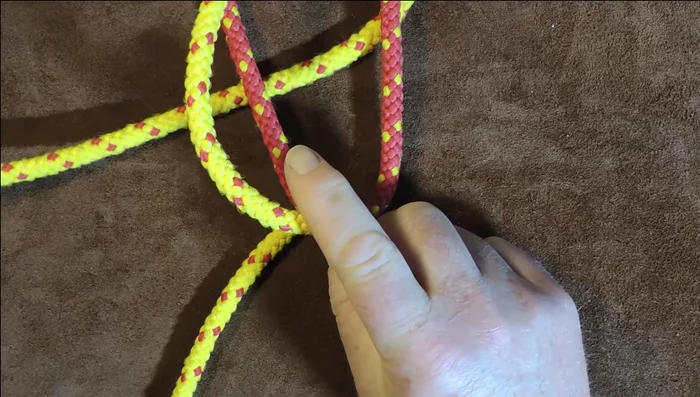
Creating the Initial Loop
- Pass the netting needle underneath the V of the top loop.
- Pull enough line through to create a loop.

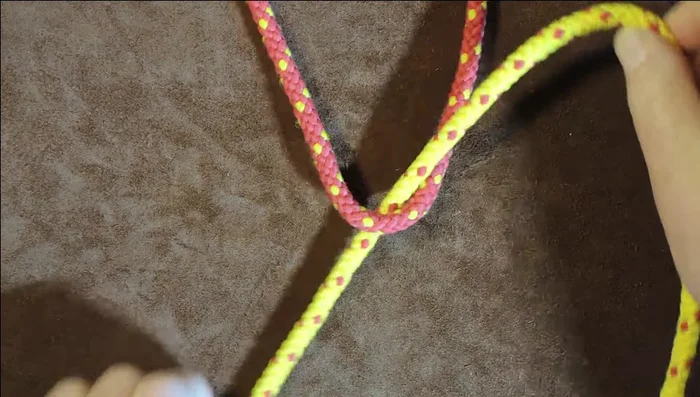
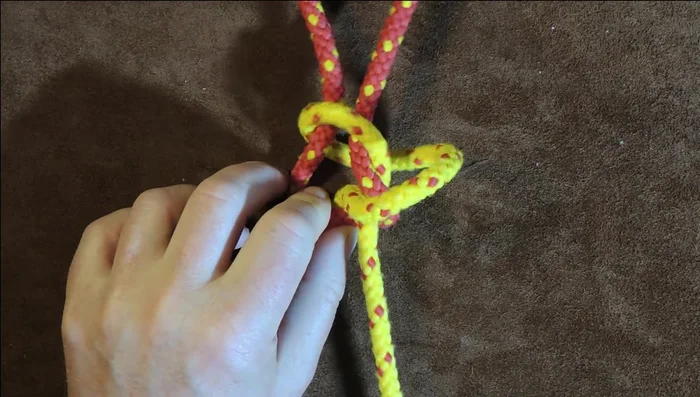
Creating the Initial Loop Passing Underneath
- Throw the loop over the back of your hand.
- Pass the netting needle underneath both red lines (loops).
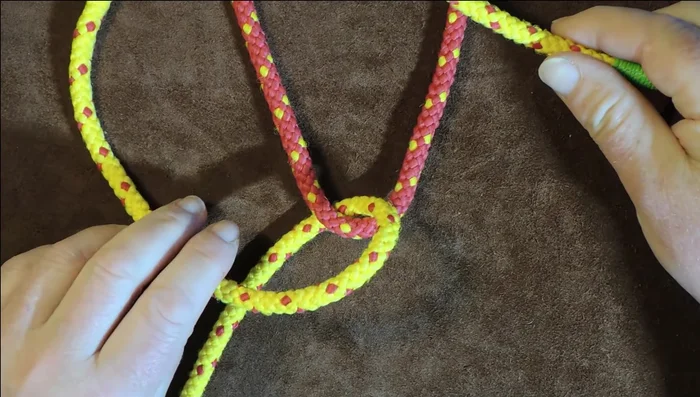
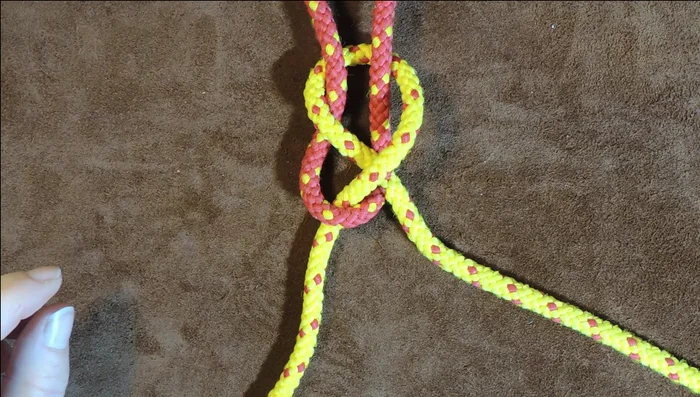
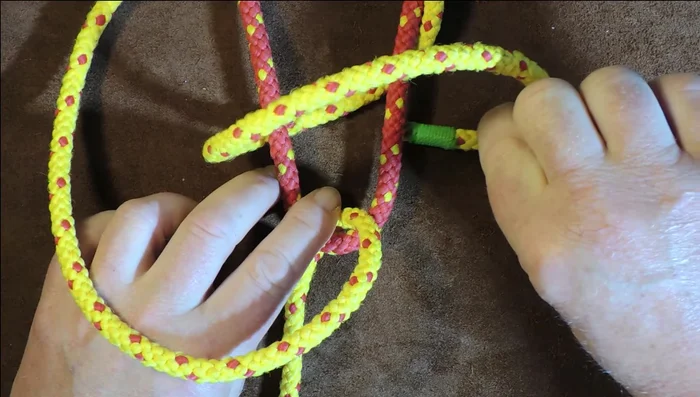
Passing Underneath Completing the Knot
- Bring the needle up through the loop on the back of your hand.
- Gently pull through to tighten the knot.
Completing the Knot
Tips
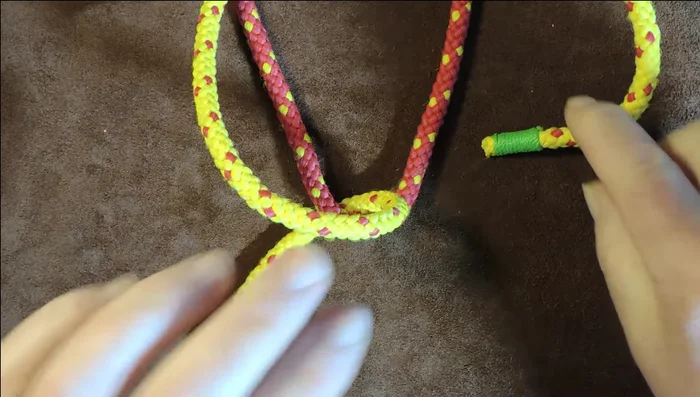
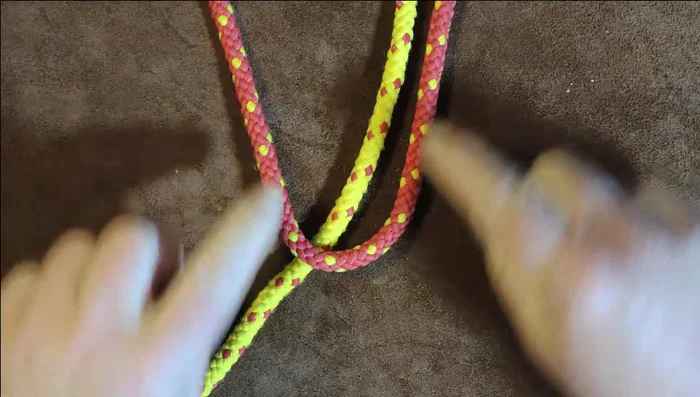
- Hold the red line to prevent the yellow line from slipping during tightening.
- Pinch the red and yellow lines tightly together where they meet to prevent slipping and ensure the knot forms above the bight of the red line.
Methods: Improved Sheet Bend with Extra Tuck for Enhanced Security
Tools Needed
- Netting needle
- Cordage
Step-by-Step Instructions
Initial Sheet Bend
- Pass the netting needle up through the bottom of the red mesh. Pull a fair bit through.
- Pass the working end over the back of your hand to form a loop.
- Pass the working end underneath both red lines (loops) and up through the loop on the back of your hand.
- Pull it through to tighten.
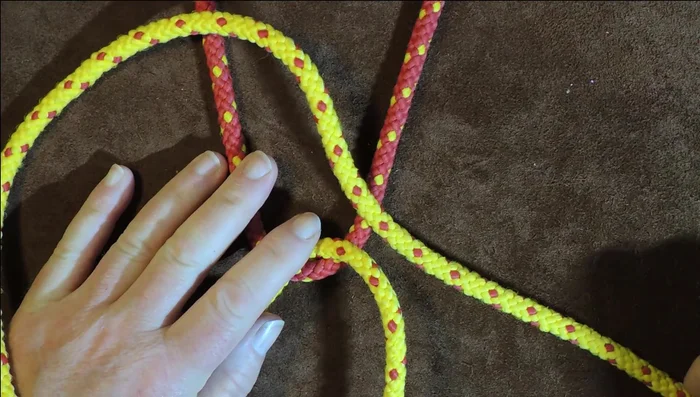
Initial Sheet Bend Extra Tuck for Security
- Take the working end and tuck it underneath the red line, bringing it up on the right-hand side.
- Pull it through to tighten.
Extra Tuck for Security
Tips
- This knot is more secure and less prone to slipping because the extra tuck locks the knot in place above the bight of the red line.